How to Make a Custom Cookie Cutter
As I was planning for my son’s Pi themed party, I figured I’d be able to track down a Pi shaped cookie cutter with out too much trouble. (Doesn’t everyone have a need for such a cookie cutter?) I did my usual Google searching and came across a really nice copper cookie cutter on Amazon, but at $23, it was priced higher than I wanted to spend. (Edited to add: I have since seen them on Etsy for under $5, but that wasn’t the case while I was planning the party.)
After my online search came to a halt, I called around to some local stores who typically carry unique things, but lucked out there too. Then I went over to Pinterest where I got the idea to make my own cookie cutter. Why not?
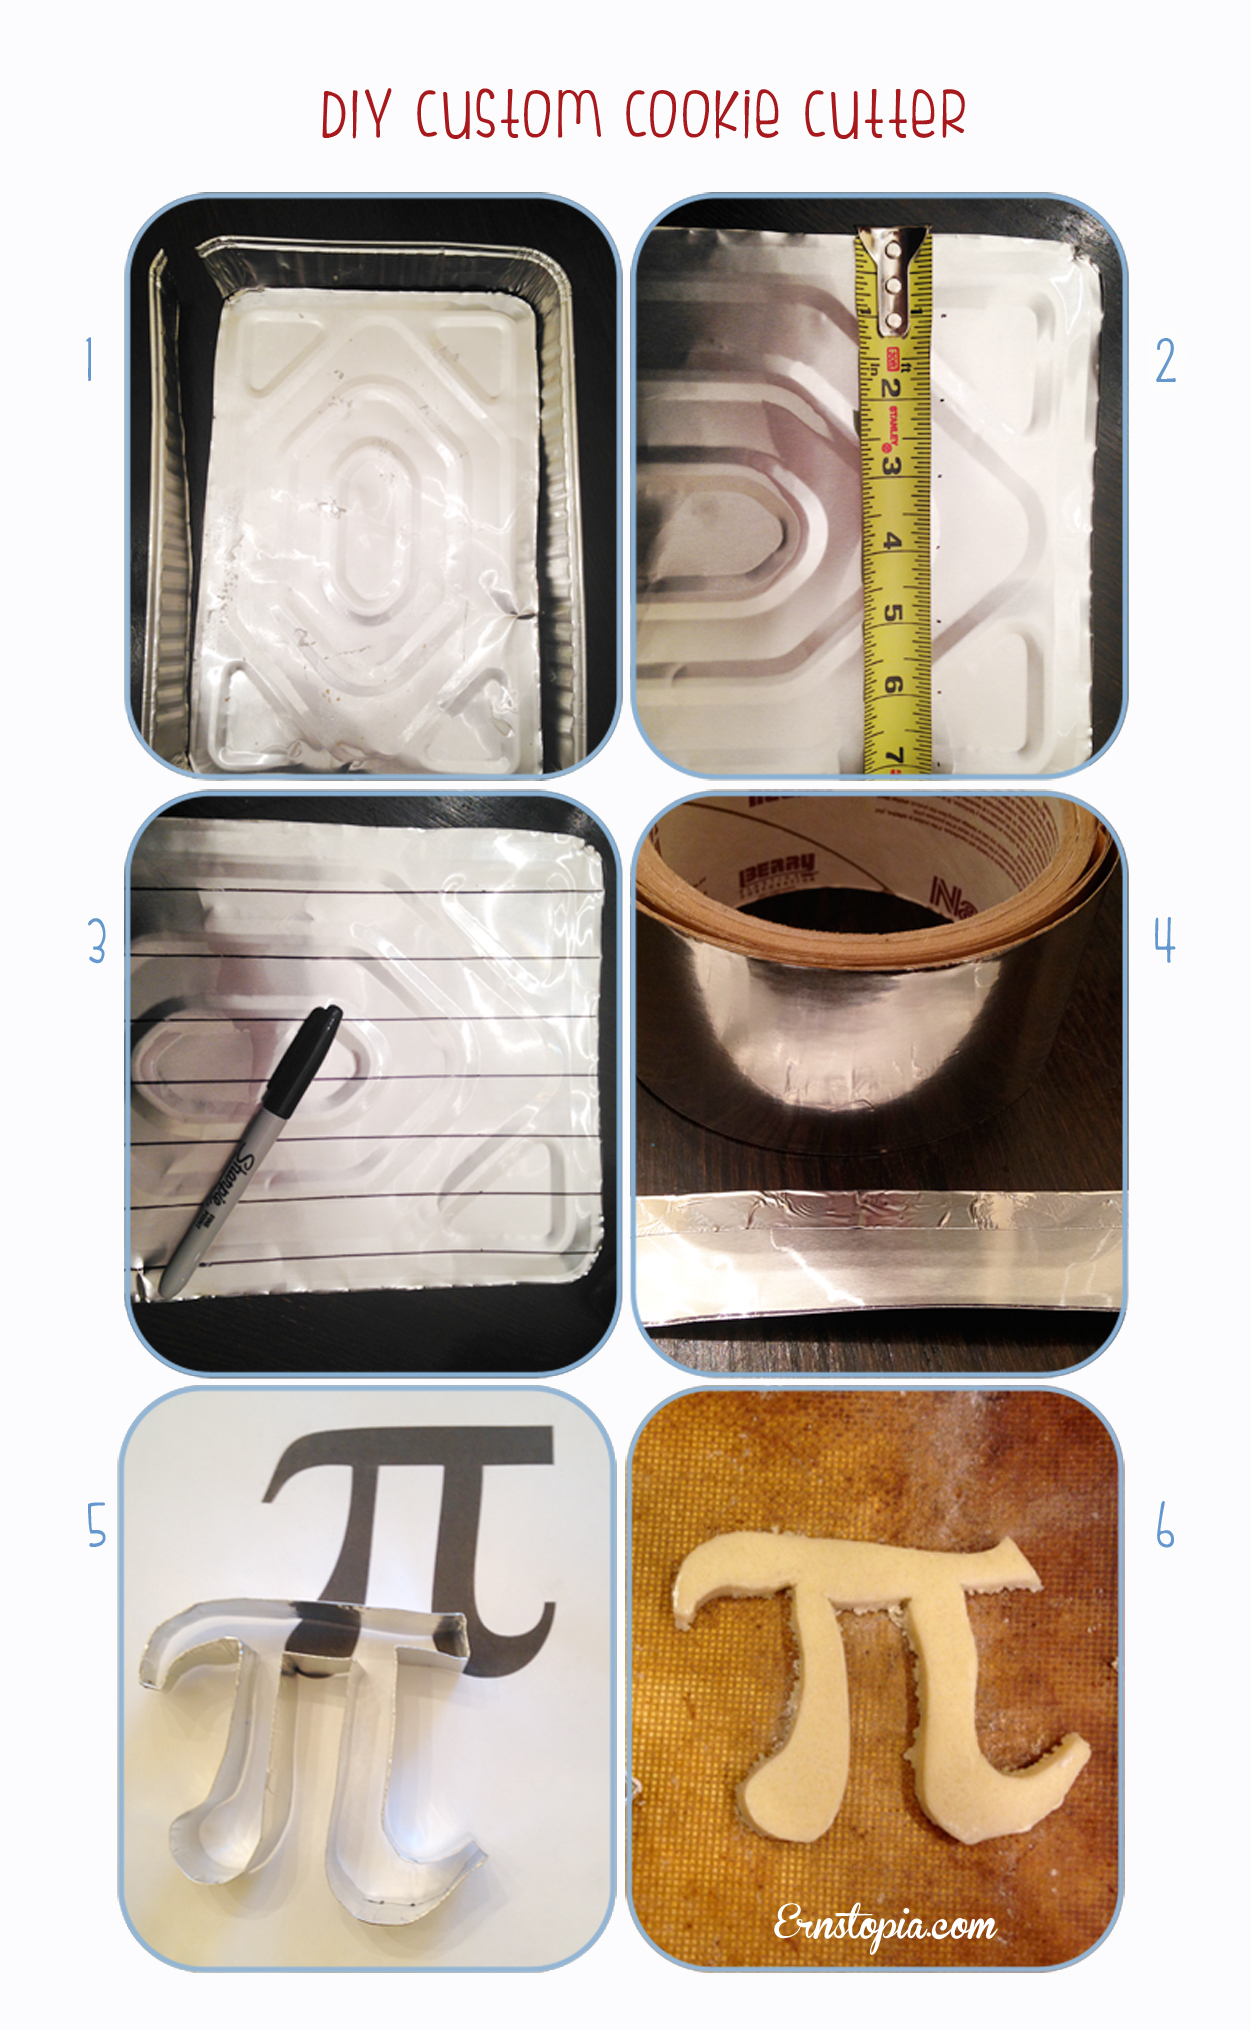
I’ve made cookies before by cutting the shapes out with a knife, but this shape needed to be fairly precise for it to not look like a hot mess. I started to look around for tutorials on how to make a cookie cutter and most of them suggested using aluminum sheet metal and a whole list of tools I didn’t have. What I did have was a much lighter weight aluminum lasagna pan from the dollar store. Not really knowing what I was doing, I improvised my way through the project. Here are the basic six steps to make your own cookie cutter for about a dollar.
- Cut the walls of the aluminum pan away from the bottom of the pan.
- With a ruler or tape measure, mark every inch with a dot on the right and left sides, going along the long edge of the aluminum.
- Using a ruler or straight edge, draw a line from one dot to the other.
- Cut the sections into strips. Using foil tape, run the tape along one edge, folding over to the other side. Once you get to the end of your first strip, line up the second strip and tuck it under the aluminum tape before folding the tape over. Continue with remaining strips of aluminum. This taped edge will not only connect all the pieces, but it also serves to provide you with a safe, less sharp side of the cookie cutter.
- Now that you have a long strip of aluminum, begin to bend it around the desired shape. The key to this step is to crease along the straight 90 degree corners and just bend slightly along the rounded corners. This was surprisingly challenging trying to hold it’s shape with one hand while trying to form the remaining sides of the cookie cutter with the other hand. It wasn’t that bad really, it just took a little patience to make it all come together.
- The final step is to roll our your chilled cookie dough on a floured surface and press down with your cookie cutter! The hardest part of this whole process will be lifting your cookie off of the counter without changing it’s shape. I found that cutting the cookie directly onto the Silpat or parchment paper, then removing the excess dough worked best and required the least amount of cookie handling. Depending on how complicated your cookie cutter shape is, this may require some experimenting. Start with one cookie. Then bake just the one to see how it changes in the oven. My first batch spread horribly in the oven and the cookies ended up looking like very chubby, hardly recognizable puffy Pi cookies! Adding more flour to the dough helps a little with this issue. Good Luck!


